Using Flowcode SCADA components to rapidly develop code
Often when developing embedded firmware or a new component you get stuck in a loop of code, compile, program and test. When trying to solve awkward issues by tweaking the code it’s often the compiling and programming stages that take the longest time. Wouldn’t it be nice if these steps could be removed to really speed up the process.
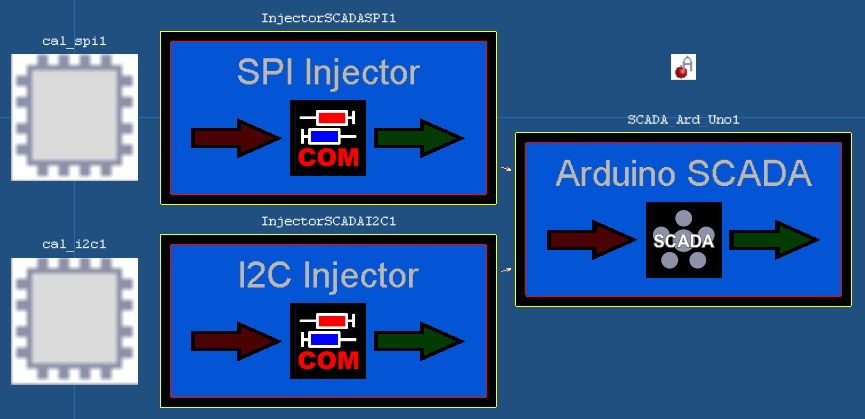
Well now they can through the use of the SCADA Slave components and the Injector components. Now you can develop a program for an sensor or display etc using for example a CAL SPI component. The CAL SPI component links to the SPI Injector component and this links to the SCADA Slave component which deals with controlling the hardware.
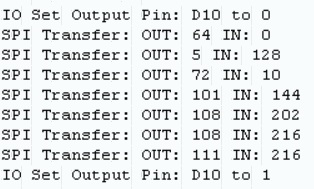
You also get the added benefit of being able to see the various comms data in a byte by byte format via the console window which provides a great level of transparency allowing for very easy and straightforward debugging.
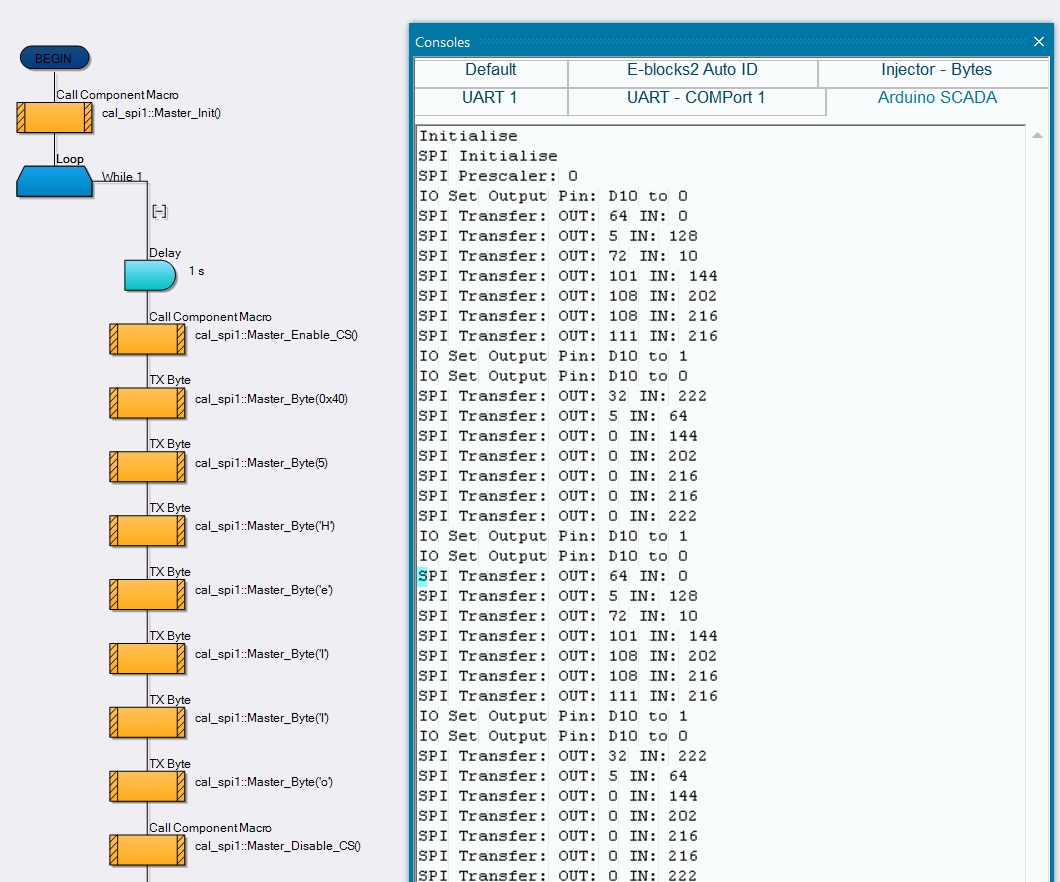
Let’s use a SPI device and work through the process of developing macros to interface with the device.
I start the project with a SCADA (Arduino Uno) component from the SCADA component menu. Next I add a Injector (SCADA Slave SPI) component from the Comms component menu. Finally I add a SPI (CAL) component from the Tools component menu.
In the CAL SPI component properties I set the Injector property to InjectorSCADASPI1.
In the SPI Injector component properties I set the SCADA Slave to SCADA_Ard_Uno1, the CS Pin number to 10 and the SPI Prescaler to 0.
In the SCADA Arduino Uno component I set the COM port to match the COM port of the Arduino board and change the Log Mode to Command Log.

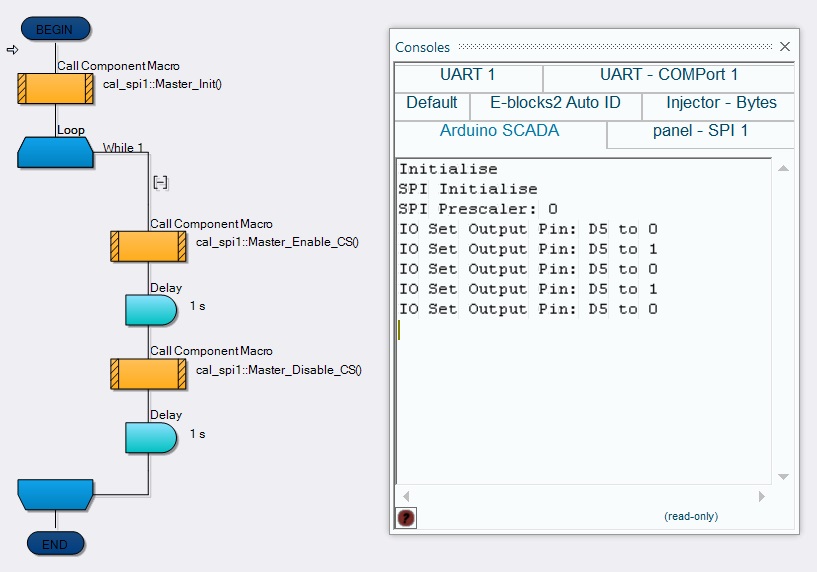
To test the setup is working I create a very simple program to initialise the CAL SPI and then create a loop which toggles the CS pin on and off. By attaching a LED and series resistor to the CS pin on the Arduino Uno I can see the LED flashing on and off when the simulation runtime is active.
So once things are setup and driving the hardware lets hook up our SPI device and start to do some SPI bus communications. Here I hooked up the Arduino device with the SPI device using dupont style cables.
Of course the injector and SCADA slave component combination can also be used with existing SPI and I²C components too. You can even use the SPI and I²C Injectors together with the same SCADA Slave component.
Full help and examples on the SCADA injector and SCADA Slave components can be found in Components section of the Flowcode 8 wiki or by right clicking a component and selecting Help from the menu.
For more on building components using CAL components there is a great tutorial available here.
https://www.matrixtsl.com/wiki/index.php?title=Using_CAL_Components
![]()
Related Posts


About The Author
BenR
Embedded engineer with experience in Cybernetics (HMI), Robotics, Mechatronics, Control Systems and Communications using Microcontrollers and Microprocessors.
Could you tweak the GLCD 7567 SPI initialise component that has an error. Commands according to the datasheet should follow the following:A2,A0,C8,A6,40,25,81,3F,2C,2E,2F,81,25,F8,00,AF.Otherwise, this display component is not initialized, and the ability to edit components has disappeared after the fifth version.It is desirable to increase its height to 128 points, please.
Hi, thanks for the message. Could you comment this in the forum or log a technical support request via the website please? We will then have a look into the issue. Many thanks.