Component: Data Injector Template (Comms)
| Author | Matrix Ltd |
| Version | 1.0 (Release) |
| Category | Comms |
Contents
 Data Injector Template component
A base data injector used as a placeholder in components which reference the data injector interface. Not recommended for use in projects.
This component can be used as a base to create child components
The following components all inherit the traits of Data Injector Template:
| Comms data injector to replicate basic AT command syntax.
The component will record each incoming character until the termination character is received. Once this happens the component will respond by echoing back the received data followed by an "OK" reply. | |
| Comms data injector to allow CAN message identifiers to be decoded to specific message strings.
Uses an external CSV file to specify the IDs and descriptive strings. | |
| Comms data injector to allow a COM port peripheral to be attached to a comms component.
The component will forward any outgoing bytes to the COM port and forward any incoming bytes to the comms component. Useful for controlling hardware such as Bluetooth, RS232, USB to Serial, MODBUS... | |
| Comms data injector to allow simulation of a DS1307 Real Time Clock and RAM. | |
| Comms data injector to allow data to be streamed to and from a file during simulation.
The component will read data from the incoming file and write data to the outgoing file. | |
| Comms data injector to allow simulation of NMEA style GPS messages | |
| Comms data injector to allow typed data values to be inserted into a component.
Allows data to be input in raw ASCII form or as numeric byte data 0-255. | |
| Comms data injector to replicate a basic loopback setup.
The component will return any outgoing data back to the receiver. | |
| Data injector to allow a physical analog input pin to be attached to a simulated component.
The component will poll for any input state changes via SCADA Slave enabled hardware. Enabling the Flowcode simulation runtime to directly interface with a physical I/O pin. | |
| Data injector to allow a physical digital input pin to be attached to a simulated component.
The component will poll for any input state changes via SCADA Slave enabled hardware. Enabling the Flowcode simulation runtime to directly interface with a physical I/O pin. | |
| Data injector to allow a physical digital output pin to be attached to a simulated component.
The component will forward any output state changes through to a SCADA Slave enabled hardware. Enabling the Flowcode simulation runtime to directly interface with a physical I/O pin. | |
| Comms data injector to allow a I2C bus peripheral to be attached to a comms component.
The component will forward any byte transactions through to a SCADA Slave enabled hardware. Enabling the Flowcode simulation runtime to directly drive a physical I2C bus. | |
| Comms data injector to allow a SPI bus peripheral to be attached to a comms component.
The component will forward any byte transactions through to a SCADA Slave enabled hardware. Enabling the Flowcode simulation runtime to directly drive a physical SPI bus. | |
| Comms data injector to allow a Serial UART peripheral to be attached to a comms component.
The component will forward any byte transactions through to a SCADA Slave enabled hardware. Enabling the Flowcode simulation runtime to directly drive a physical UART. | |
| Comms data injector to allow components to talk to each other between instances of Flowcode.
The injector allows the data to be sent and received between multiple instances of Flowcode either running on a single machine, across a network or via the internet. |
Examples
AT Example
GSM Example File
![]() GSM Example
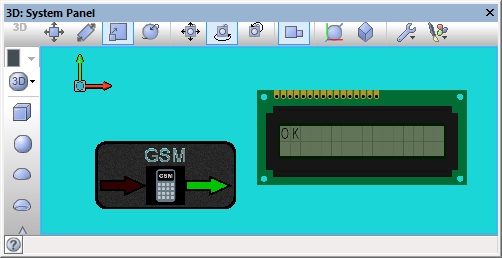
Example should show the following on the display on the panel and on the hardware.
GSM Example
Example should show the following on the display on the panel and on the hardware.
The AT injector component allows us to simulate the response of the GSM module.
CAN Example
The CAN component works together with the injector component to allow you to decode a CAN message ID into a meaningful command.
![]() CAN_Example1
When a key on the keypad is pressed the CAN components transmits a CAN packet.
CAN_Example1
When a key on the keypad is pressed the CAN components transmits a CAN packet.
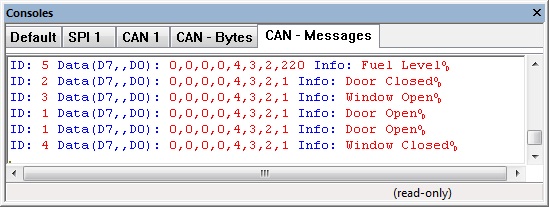
The CAN packet is decoded by the injector component to give us a meaningful log on the console window.
High Level CAN Data Console
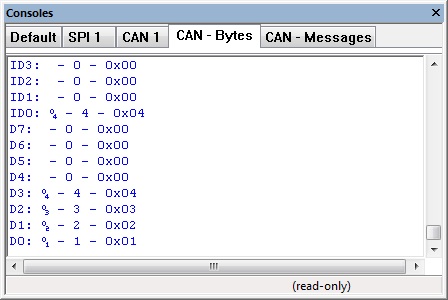
Low Level CAN Data Console
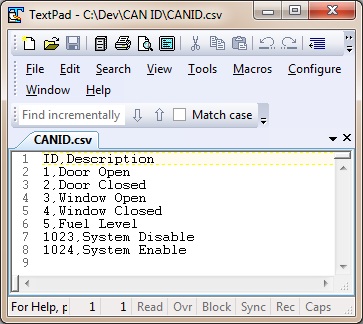
Reference from CAN Injector to ID decode file, $(srcdir) refers to the current project directory.
Demo CAN ID file File:CANID.csv
DS1307 Example
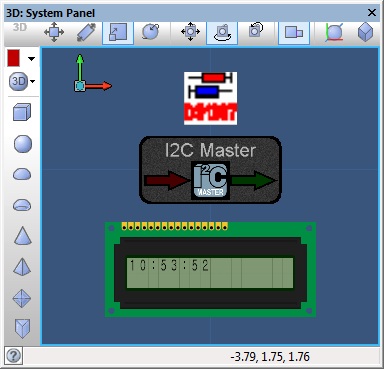
This example uses the I2C master component combined with the DS1307 injector to simulate an I2C communications bus between the target Microcontroller and the virtual DS1307 device.
![]() I2C DS1307 Example
The panel displays the current time from the DS1307 RAM which is populated to match the system time.
I2C DS1307 Example
The panel displays the current time from the DS1307 RAM which is populated to match the system time.
The I2C console shows the communications between the target microcontroller and simulated I2C device.
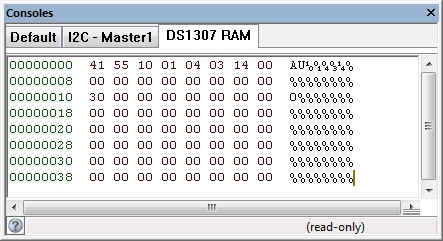
The DS1307 console shows the contents of RAM memory on the simulated I2C device.
GPS Example
GPS Example File
![]() GPS Example
Example should show the Latitude generated by the GPS injector as well as the system time in simulation or UTC time on hardware.
GPS Example
Example should show the Latitude generated by the GPS injector as well as the system time in simulation or UTC time on hardware.
Example data provided by the GPS NMEA injector component
Human Interface Example
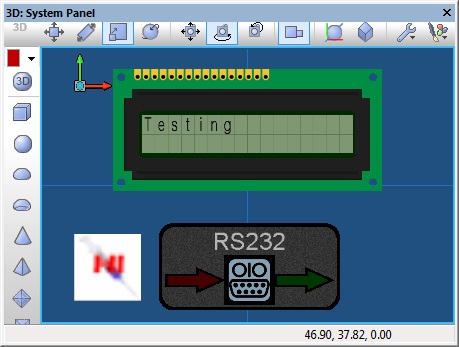
This example receives a character via the RS232 component and outputs it to the LCD, an injector has been added to allow you to type data into the console.
![]() Human Interface Injector Example
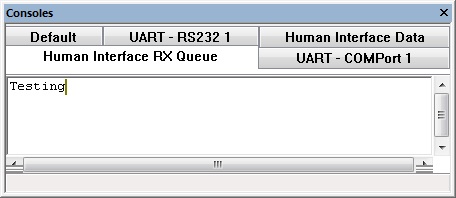
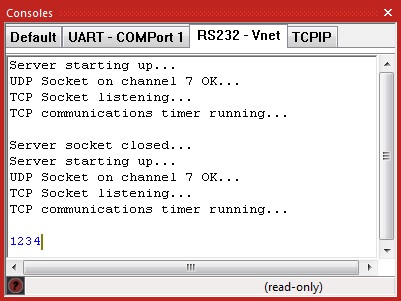
The Console window has tabs for the human interface data injector allowing you to type in data that will be received by the component.
Human Interface Injector Example
The Console window has tabs for the human interface data injector allowing you to type in data that will be received by the component.
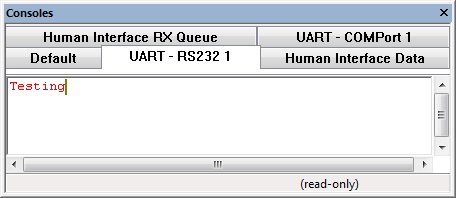
Again the RS232 console tabs reflect the data as it is sent and received.
LCD showing received data.
vNet Example
Here is an example of using the vNet injector to simulate a multi microcontroller system.
Microcontroller 1 is connected to a keypad and has a RS232 communications connection.
Microcontroller 2 is connected to a solenoid and has a RS232 communications connection.
Any key presses detected on microcontroller 1 will be sent via RS232 to microcontroller 2. If the correct byte sequence (1234) is received by microcontroller 2 then the solenoid is fired to unlock a door for 5 seconds.
![]() vNet Example Node 1
vNet Example Node 1
![]() vNet Example Node 2
Communications over the vNet injector can be monitored using the console.
vNet Example Node 2
Communications over the vNet injector can be monitored using the console.
SCADA Slave Example
Using one of the SCADA Slave components together with one of the SCADA Slave injectors allows simulated comms data to be piped through to real world hardware. This allows for rapid prototyping and testing without the pains of repeated compilation and programming. This feature can be used with any component that contains SPI, I2C or UART based comms (depending on the hardware).
Here is an example using the Arduino Uno as the host board. The Arduino has been pre-programmed with the SCADA Slave firmware available from the Component: SCADA (Arduino Uno) (SCADA Slaves)
Creating New Injector Components
Here are some example Injector component source files which go a good way towards demonstrating how to create your own injector component.
DS1307 I2C Device Example Injector Source
AT Device Example Injector Source
More information is available here: Matrix Flowcode Blog: Flowcode and Injector Components
Downloadable macro reference
This component does not contain any downloadable macros
Simulation macro reference
InitialiseInjector
Sets the name of the console tab and initialises any buffers. Usually automatically called as part of the CAL component Initialise/Property event macros.
Not usually called as part of a users program.
Parameters
- <- STRING InjectorName
- This parameter may be returned back to the caller
Return value
RxByteCount
Returns the number of bytes currently sat in the receive buffer.
Parameters
- This macro has no parameters
Return value
TxByte
Transmit a byte out to the Injector
Parameters
- BYTE Data
Return value
- This call does not return a value
RxByte
Attempt to receive a byte back from the injector
0 - 255 = Valid data
256 = RX timeout no data available
Parameters
- This macro has no parameters
Return value
GetTxConsoleHandle
Gets the handle to the console allowing data displaying on the panel etc.
Parameters
- This macro has no parameters
Return value
ChangeState
Changes the state for I2C or SPI type comms where the data bytes along are not enough to go on.
Parameters
- BYTE NewState
- Assigns new state, 0=default
Return value
- This call does not return a value
GetRxConsoleHandle
Gets the handle to the console allowing data displaying on the panel etc.
Parameters
- This macro has no parameters
Return value
Property reference
Circular Buffer Size
This property is of type Unsigned integer and can be referenced with the variable name CircularBufferSize.
No additional information
