Pico Toolchain
Note: Using Raspberry Pi Pico with Windows 7 or 8 is not officially supported. To build Pico projects you will need to install the following tools:
ARM GCC compiler
CMake
Build Tools for Visual Studio 2022
Python 3
Git
Installing ARM GCC Compiler
Download the Windows Installer from:
https://developer.arm.com/downloads/-/gnu-rm
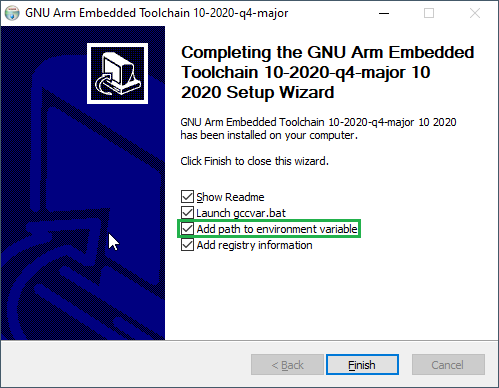
During installation, you should tick the box to register the path to the ARM compiler as an environment variable in the Windows shell:
The command prompt that the installation opened can be closed.
Installing CMake
Download the Windows CMake3.20.5 Installer from: https://cmake.org/files/v3.20/
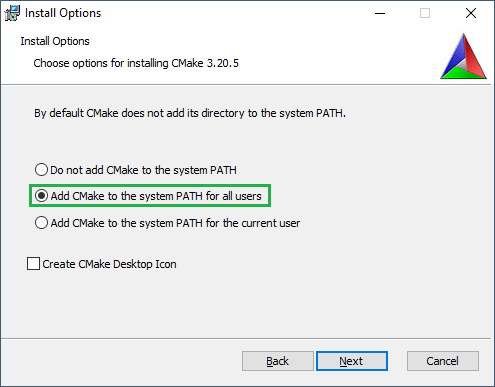
During the installation add CMake to the system PATH for all users:
A PC reboot is recommended after installing CMake.
Installing Build Tools for Visual Studio 2022
Download the Windows Installer from:
https://aka.ms/vs/17/release/vs_BuildTools.exe
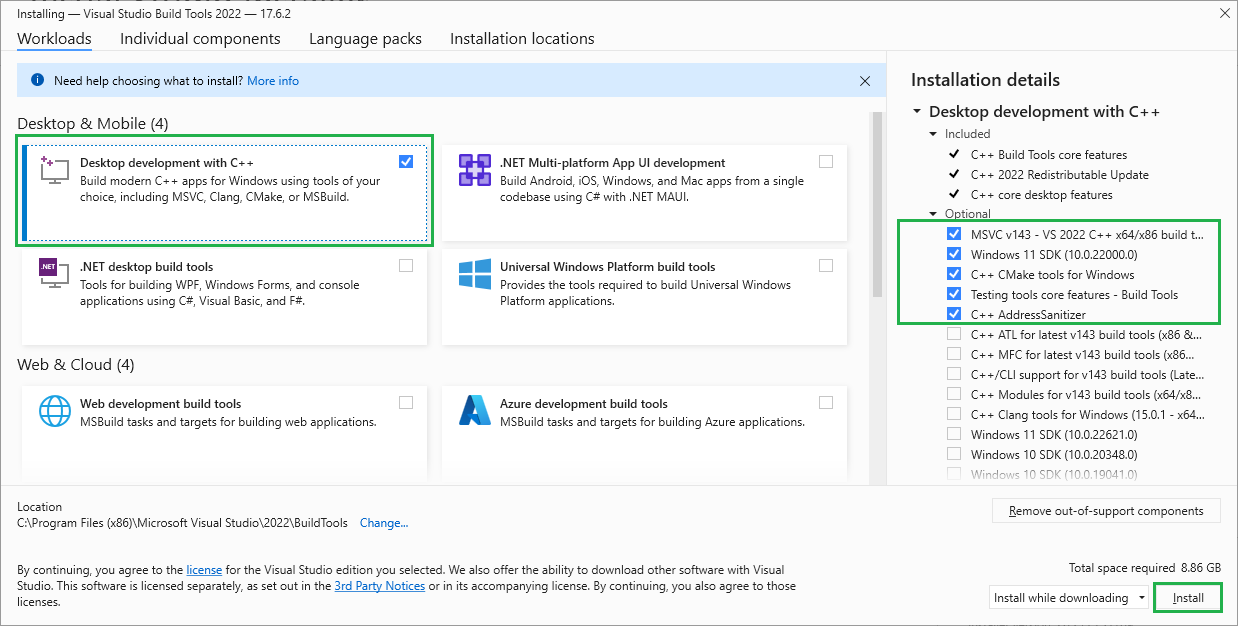
When prompted by the Build Tools for Visual Studio installer you need to install the C++ build
tools only.
You must install the full "Windows 10 SDK" package and leave the path as the default value:
At around 21% completed its takes a little while to continue, this is normal
Installing Python 3
If you already have Python 3 installed on your PC (for example if you have already installed the ESP toolchain) skip this section and do not re-install Python.
Download Windows Installer from: https://www.python.org/downloads/windows/
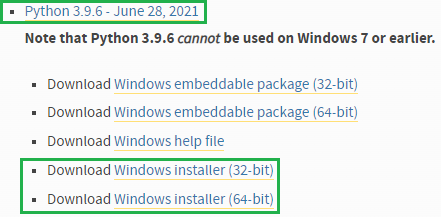
Look for version 3.9.6:
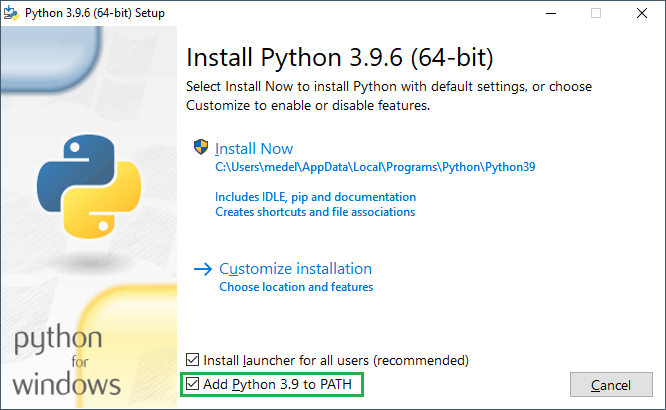
Ensure that it’s installed 'for all users' and add Python 3.9 to the system PATH:
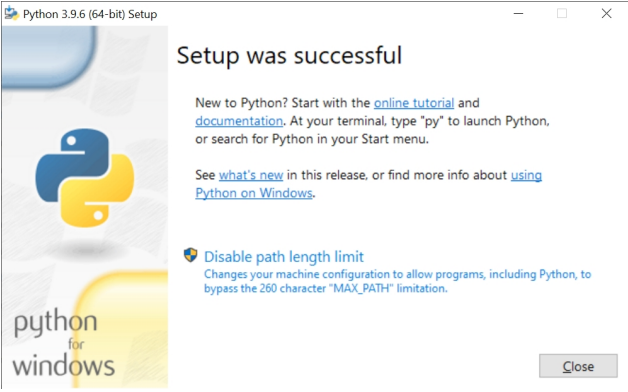
Disable the MAX_PATH length limit when prompted at the end of the Python installation:
Installing Git
Download the Windows Installer from: https://git-scm.com/download/win
When installing Git you should have Only show new options unselected.
There is no need to change any default setting for all the checkboxes
Ensure that you change the default editor away from vim, for example if you have notepad++:
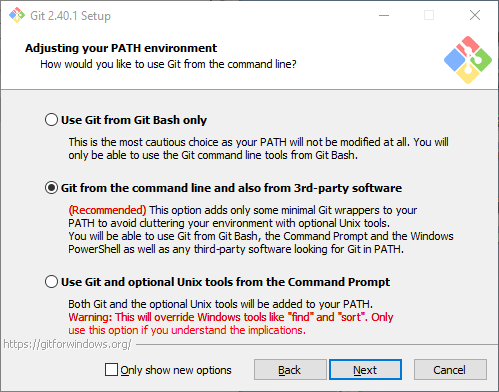
Ensure you tick the checkbox to allow Git to be used from third-party tools:
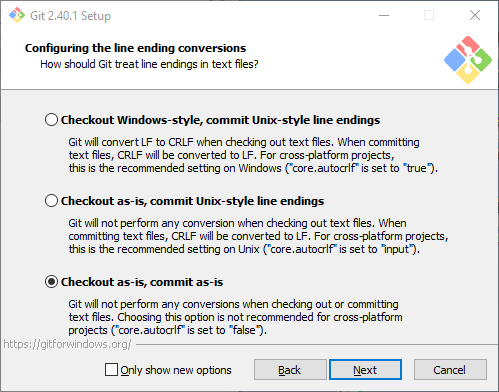
Don't select any NEW! options, leave options as default. Select "Checkout as is, commit as-is":
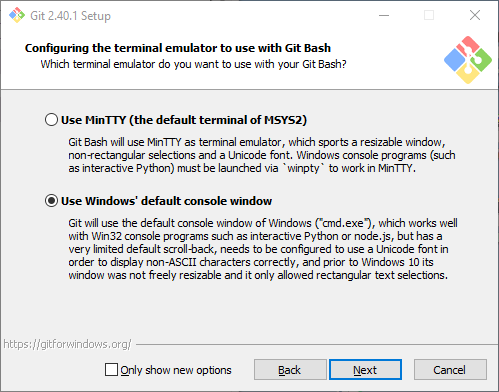
Select "Use Windows' default console window":
Leave all the defaults Ticked
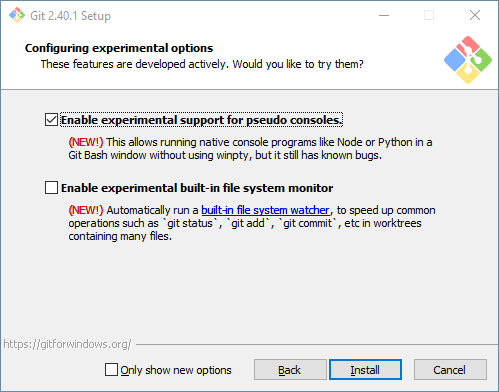
Check "Enable experimental support for pseudo consoles" during the installation process:
Installing the Pico SDK
Use Git to download the Pico SDK to a location on your PC.
For example, install to your user Downloads directory:
C:\Users\YourName\Downloads\pico-sdk
Run a command prompt (type "cmd" at the start search box) and run the following commands: cd Downloads
git clone -b master https://github.com/raspberrypi/pico-sdk.git
cd pico-sdk
git submodule update --init
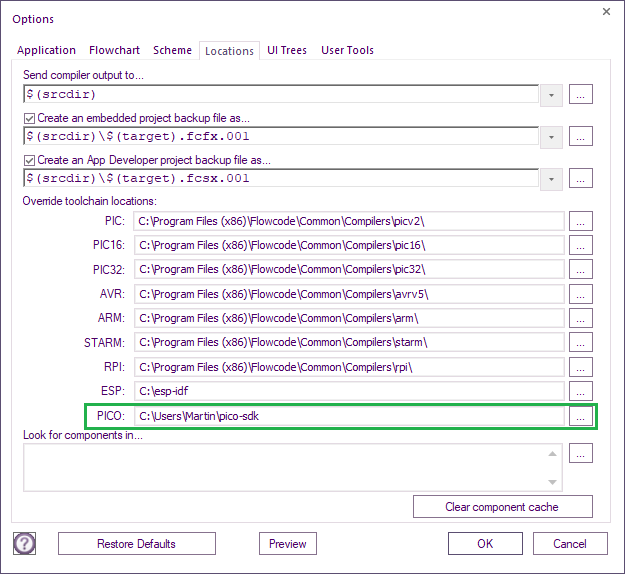
Setting up Flowcode for use with the Pico toolchain Copy the location of the Pico sdk (e.g. C:\Users\YourName\Downloads\pico-sdk) into the
Global Settings > Locations tab or if you have a project loaded
File > Global Settings > Locations tab:
Programming The Pico
The Pico is a free target device.
Run Flowcode & Select New Project
Either right-click on any target & select Search... and enter pico, then select Find Next:
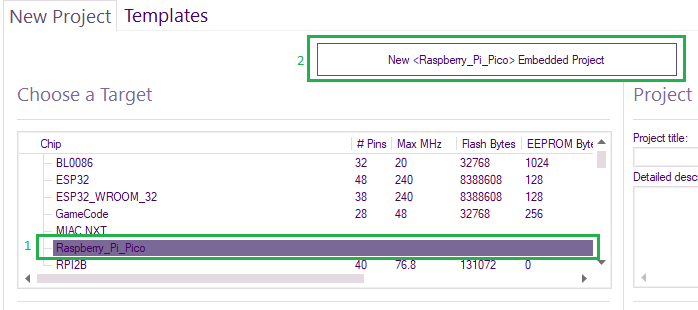
Or Go to the Free targets section, expand Free targets and scroll down and select Raspberry_Pi_Pico
Select New <Raspberry_Pi_Pico> Embedded Project:
Sending Your First Program
Before sending your flowchart to the Pico, you must first enable boot mode.
To do that, make sure the pico is not connected to your PC.
Hold the BOOTSEL down and plug the Pico into your PC.
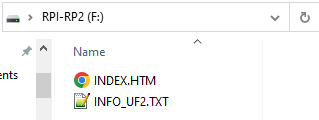
If you hear the USB connected sound and you also get a popup like this:
Then your Pico is ready to be programmed.

