Using the Data Console
Contents
Console Introduction
The Data Console allows the user to monitor raw data and display the process of a component fucnction and even the progress of the flowchart by writing to the console using Simulation Macros to send / write data to the console.
The console has many macros and functions for effective use in simulation, text and data can be displayed on the console from raw data to variable values and even manually inputted text strings.
Text can be inputted before or after data from variables or other sources, for example, you can write text to the console before a variable value to name or label the data, you can also write text after the variable to display a value or unit after the data e.g. Volume = 10dB, Speed = 25mph etc. (text before variable value text after) this can be done using only 3 Simulation Macro icons.
The Data Console can be used for creating counters, trackers and monitoring information etc. this information is displayed in the console to present relevant information and data to clarify the process of the program and is especially useful for demonstrating the program.
Creating a new console tab
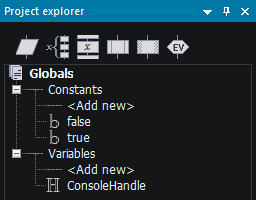
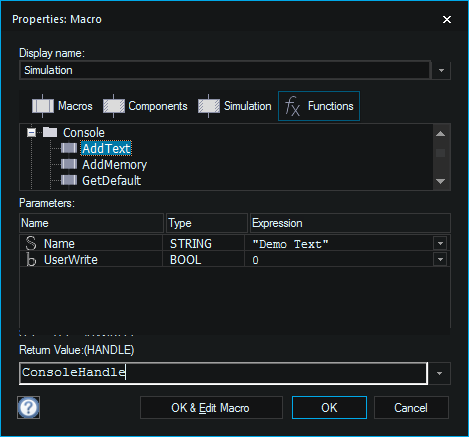
To create a new console tab you first need to create a global handle type variable to store the reference to the console window. This is basically a unique number which used to refer to that specific tab of the console window. To do this open the Project Explorer window and select the Globals tab. Next right click the Variables portion of the tree view and select Add New from the menu. In the Create a new variable dialogue that pops up give the variable a meaningful name such as ConsoleHandle, then switch the variable type to Object Handle and click OK. You should then get a Object handle variable appearing in the Project Explorer window.
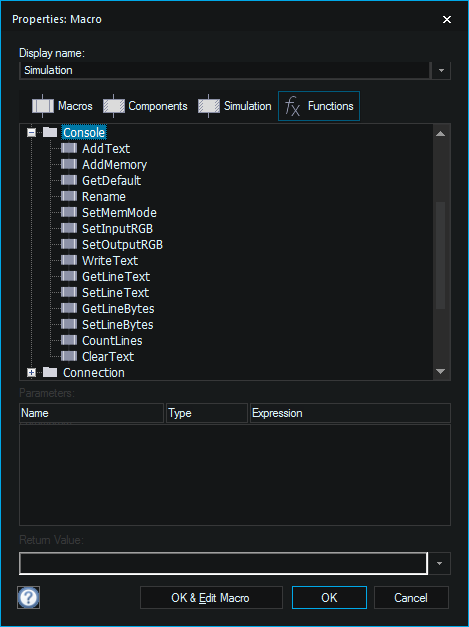
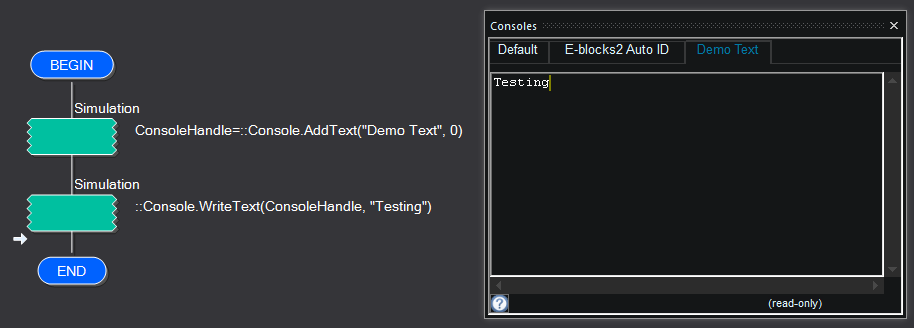
Next we need to assign the handle variable with a value by calling the Simulation API. To do this we add a simulation macro icon to the Main flowchart and double click the item on the flowchart to edit the icon's properties. Inside the icon property window we first need to ensure that the Functions tab is selected and then scroll down to the Console section before clicking the + icon to see all the API calls related to the Console functionality.
There are two API calls related to creating a new console tab which dictate how the data will appear in the tab by default. The AddText function call creates a new tab as ASCII based text only and the AddMemory function call creates a new tab which defaults to displaying bytes in decimal or hexadecimal format. The return value for both function calls requires a handle type variable, luckily we have already created this above. To access the default tab of the console we can instead call the GetDefault API call and this will populate our handle variable with the specific reference of the default tab.
When we run the simulation the new tab will be created on the console window ready for data to be inserted.
By moving the API call from the Main macro to say the simulation initialise event macro we can create a component which will automatically add our new console tab when the component is added to a program. This is the way that components such as the communications based components add their tabs to the console window.
Assigning the handle variable with the value of 0 using a Calculation icon or calling the System -> DeleteHandle API call will effectively remove the tab from the console window.
Writing data to the console
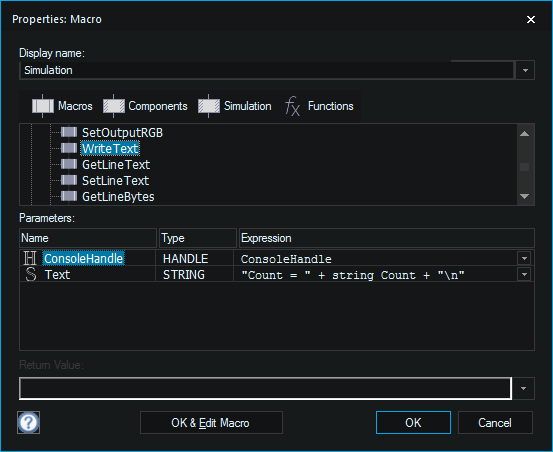
Writing data to the console window can be done at any time from any macro by using the [[Simulation_Macro_Icon_Properties|simulation macro] icon and calling the Console -> WriteText API function.
If we want to display the value of a variable then this can be done by simply passing the variable to the Console -> WriteText API function.
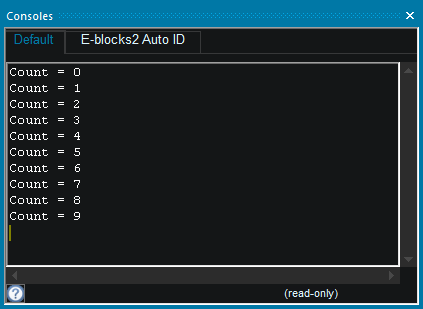
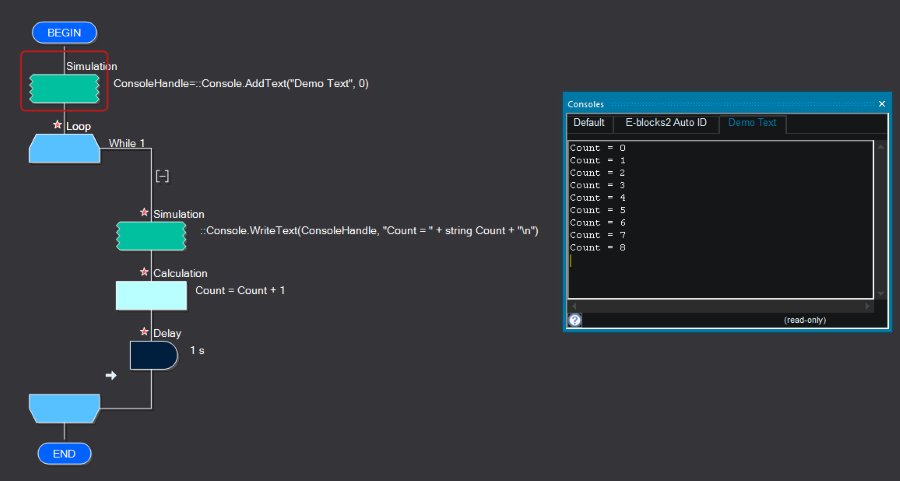
By adding a simple loop, a increment to a variable and a delay we can create a very simple demo to show the console in action as a debugging interface.
Reading data from the console
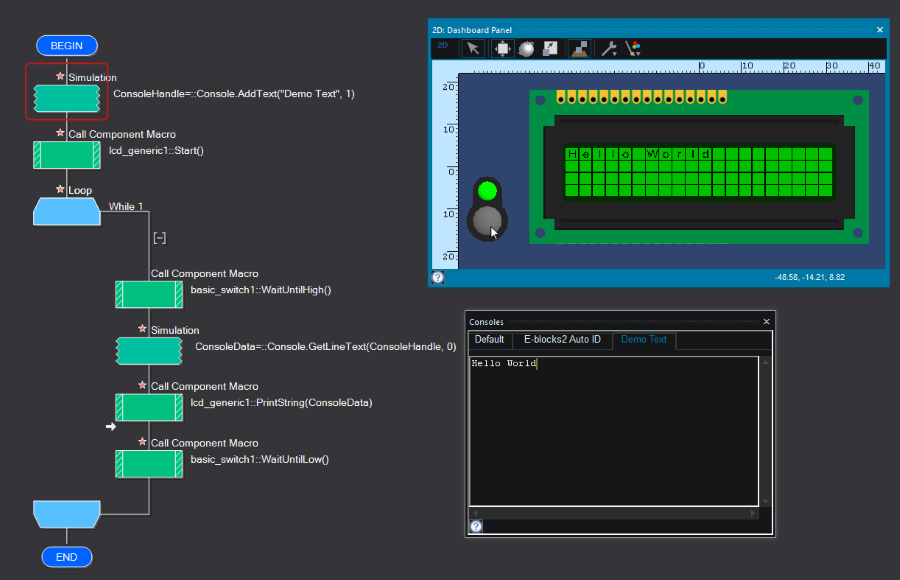
Reading a line of data from the console window can be done at any time from any macro by using the simulation macro icon and calling the Console -> GetLineText API function.
Here is a simple demonstration program that allows a user to type a line of data into the console which is then passed to the LCD component on the panel when the switch is pressed. The ConsoleData reference is a string variable created to hold the value returned from the Console -> GetLineText API function.
If we wanted to we could clear the user data from the console at the end of the loop by using the Console -> SetLineText API function and passing an empty string e.g. "".
Text Colour
The output and input text colour can be changed using the SetOutputRGB and SetInputRGB simulation functions, to do so you must enter the required parameters; a Handle value for the ConsoleHandle parameter and a ULONG value for the RGB parameter. This can be changed as often as necessary so specific text and data can be displayed in different colours to highlight important or relevant information.
This type of functionality can be seen with the communications components where outgoing data is displayed in blue and incoming data is displayed in red.
